Shopify: Creating a Custom App
This article covers how to integrate Zuzana with your Shopify store using a Custom Shopify App.
Published Jan 12, 2016
🚀 Guide: Connecting Zuzana to Your Shopify Store
Follow this step-by-step tutorial to create a secure, custom connection between your Shopify store and Zuzana. This process ensures your data remains private and your integration is optimized for performance. FYI: Keep in mind that has to be done by a Shopify Admin.
Phase 1: Create Your App
The first step is to register a new application within the Shopify developer ecosystem.
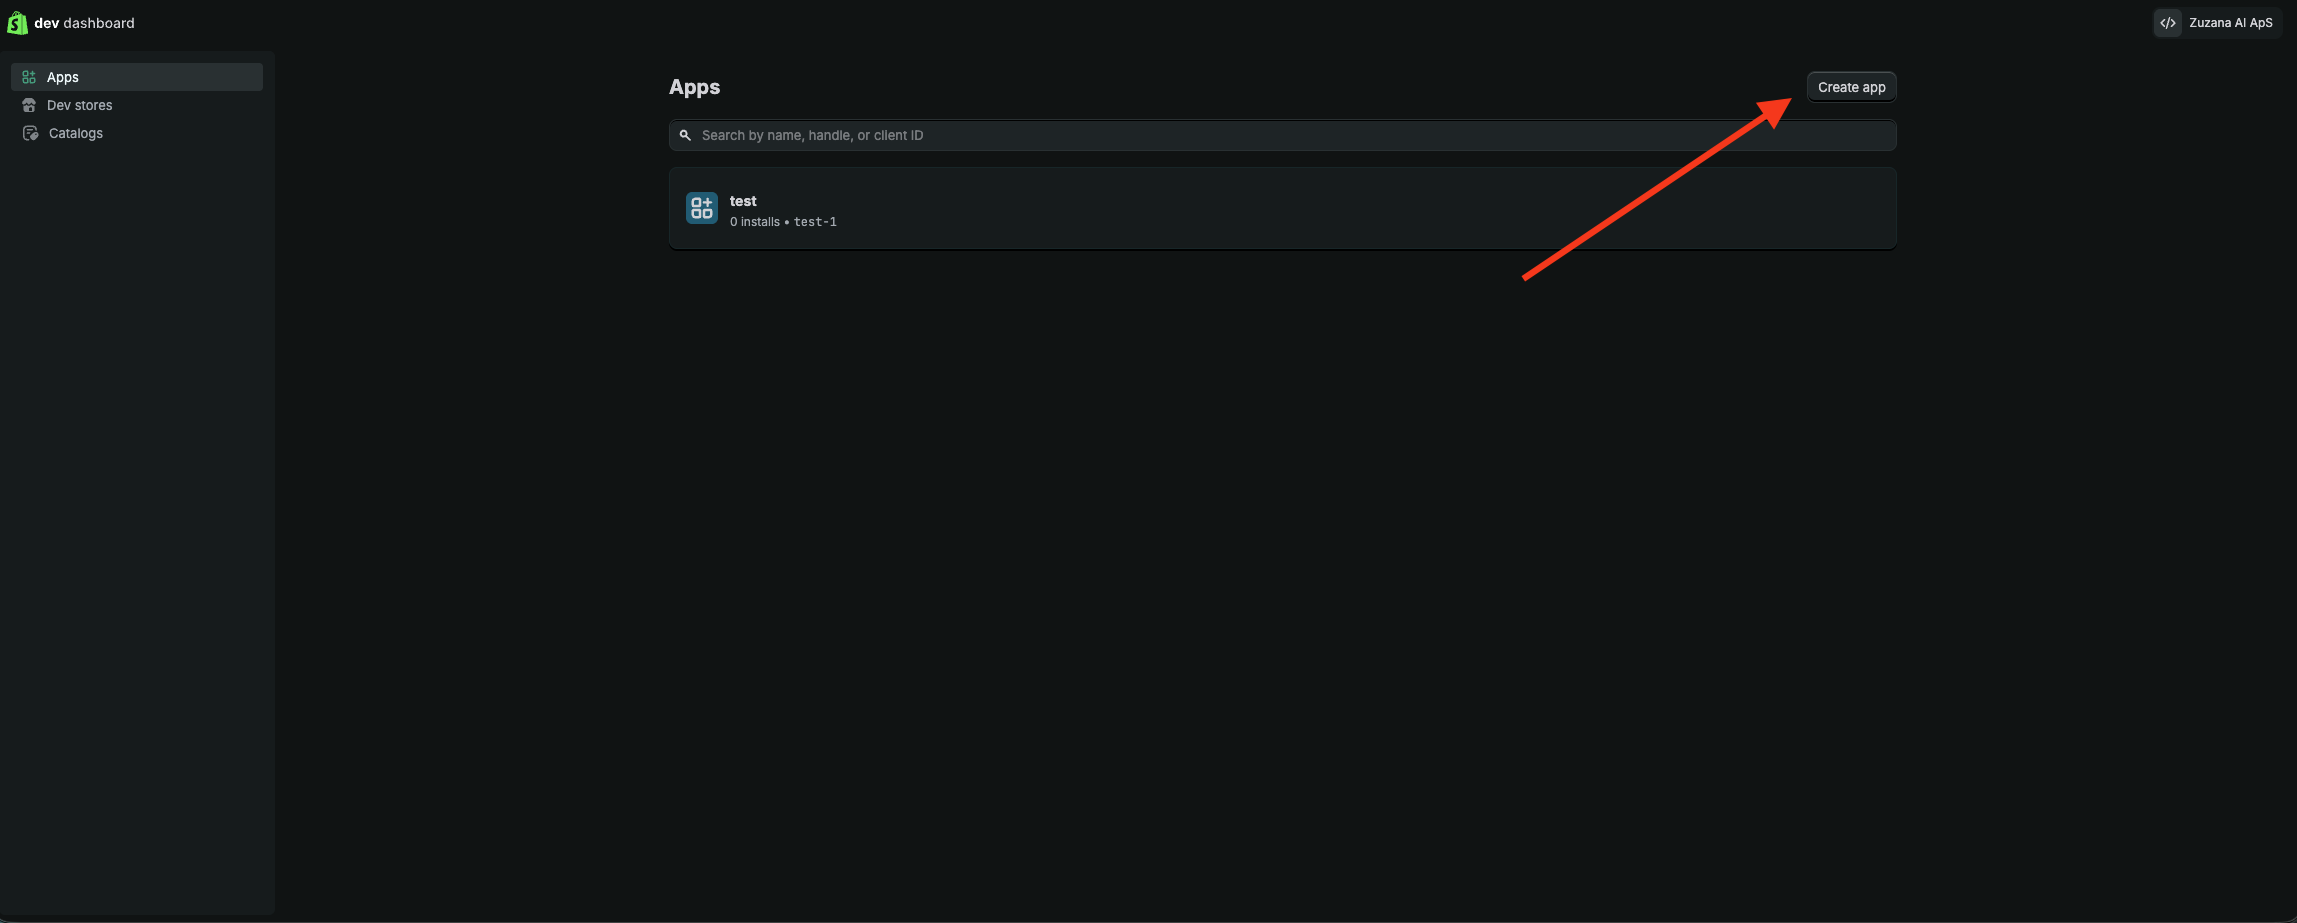
- Access the Dashboard: Go to the Shopify Dev Dashboard.
- Start Creation: Click the Create app button in the top-right corner.
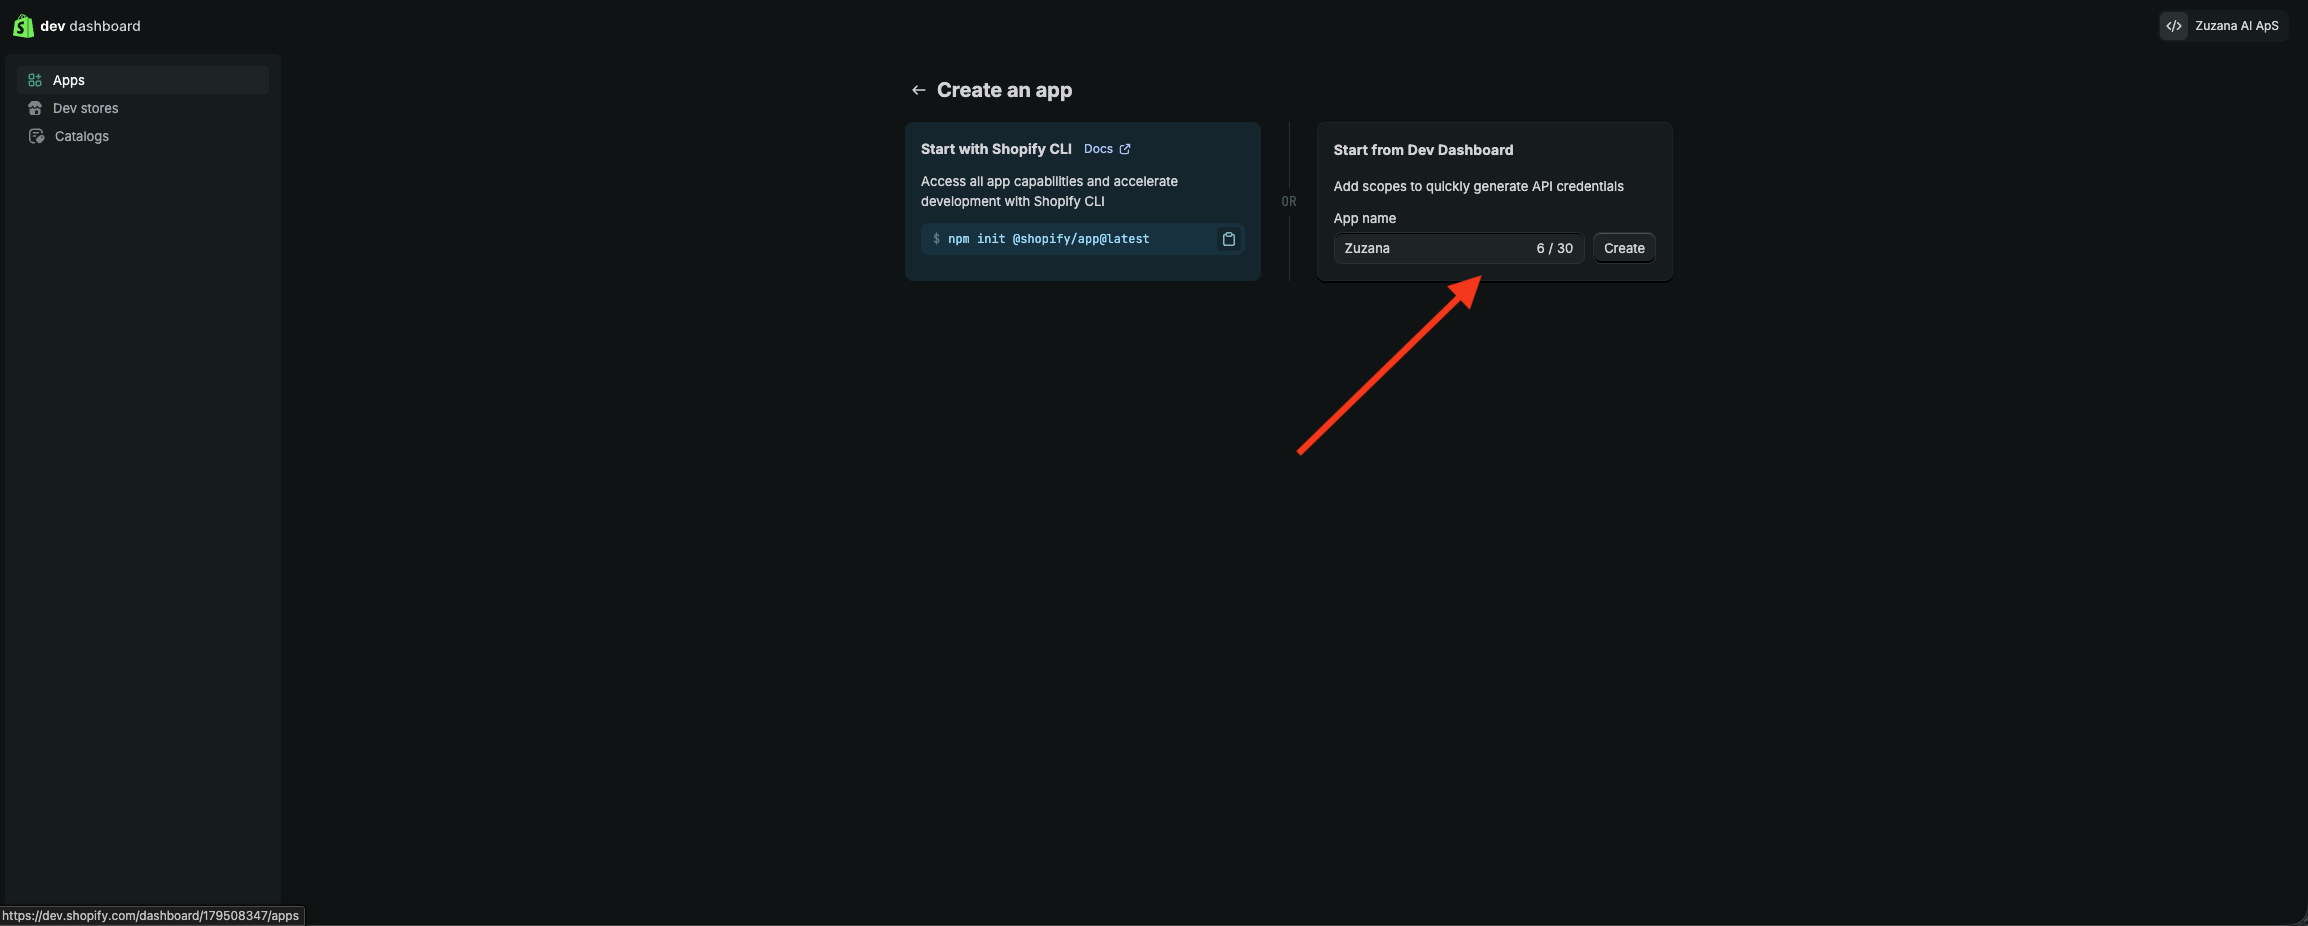
- Choose Integration Type: On the selection screen, choose Start from Dev Dashboard. This is the standard method for private, custom integrations.
- Name Your App: In the "App name" field, enter Zuzana. Click Create to proceed.
Phase 2: Configure Permissions & URLs
Now you must tell Shopify exactly what data Zuzana is allowed to access and where to send it.
- Navigate to Versions: From your app's home screen, click the Versions or Configuration tab.
- Create a New Version: Click Create version.
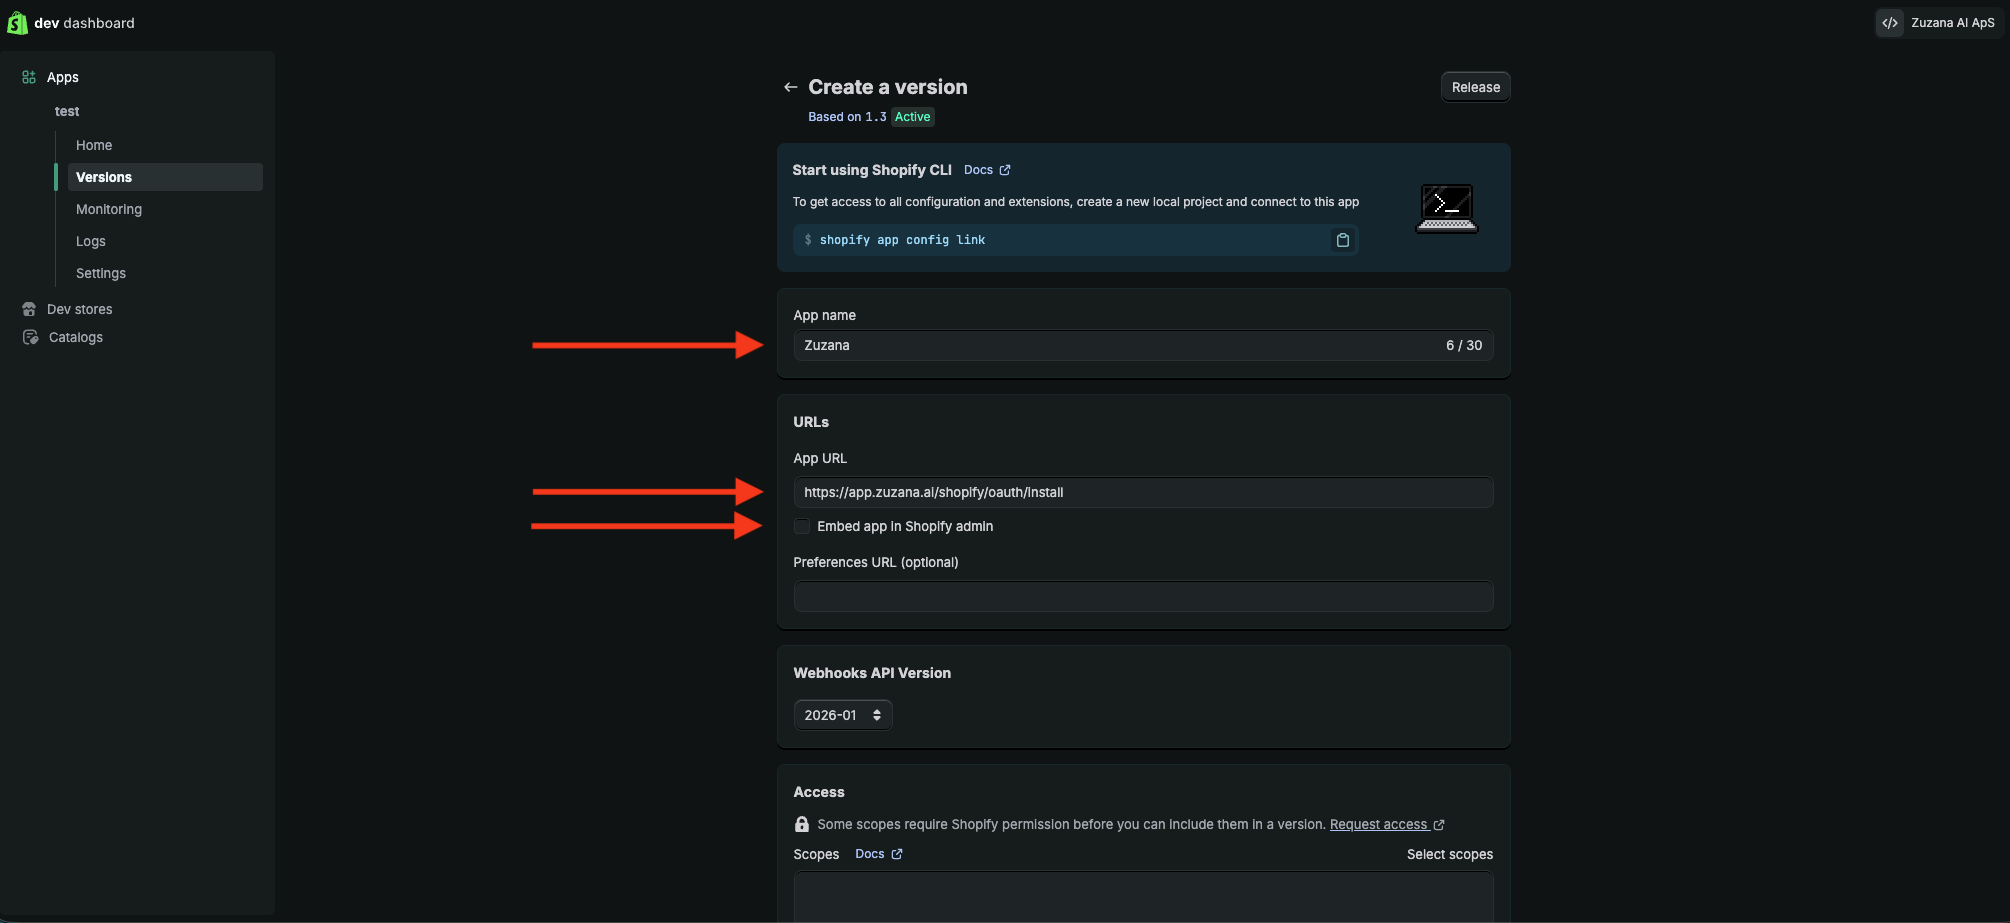
- Specify App name: Put "Zuzana" or something (not really important).
- In URLs section:
- Copy & paste this App URL: https://app.zuzana.ai/shopify/oauth/install
- Uncheck "Embed app in Shopify admin"
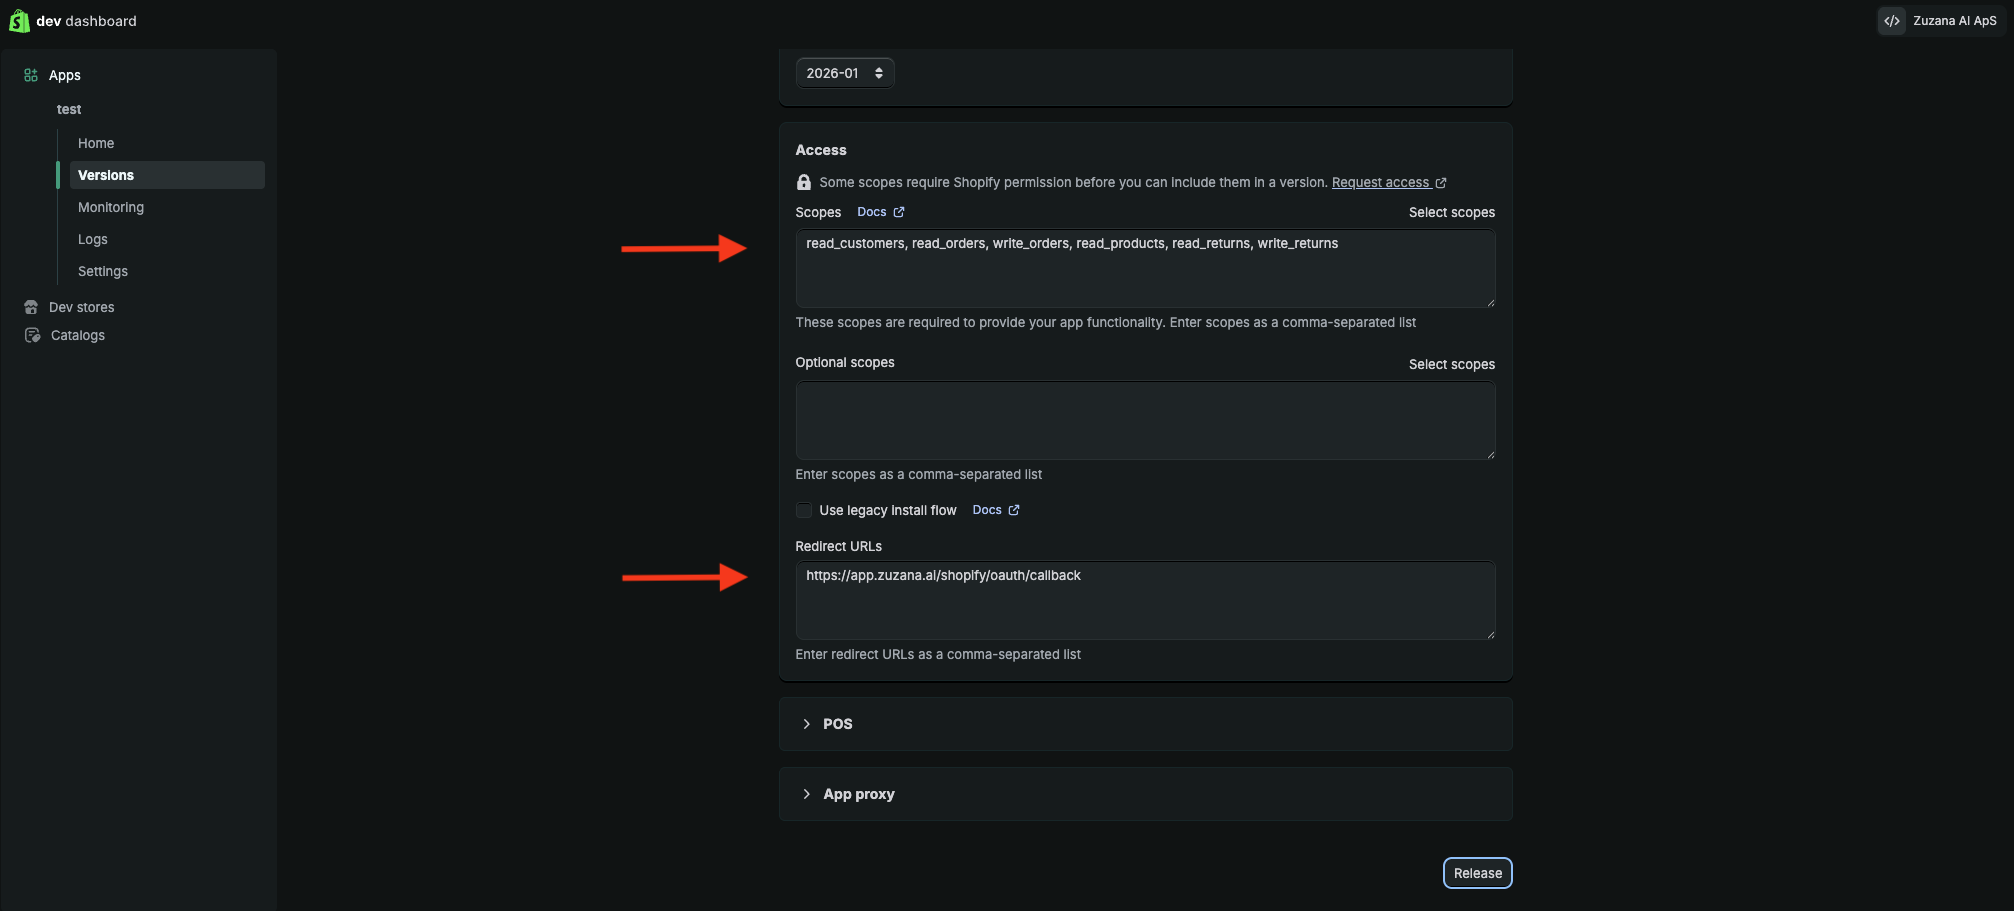
- Scroll down to Access section. In the Scopes text area, copy and paste the following permissions exactly:
write_orders, read_products, write_returns, write_customers, write_merchant_managed_fulfillment_orders
- Configure Redirect URLs:
- Copy & paste: https://app.zuzana.ai/shopify/oauth/callback
- Finalize Version: Scroll down and click Create version. You should see a confirmation that "Version 1.0" (or similar) has been successfully created.
Phase 3: Release & Install
- Release the Configuration: On the version history page, click the Release button next to your newest version.
- Confirm Release: A prompt will appear; select Release this new version. This activates your settings.
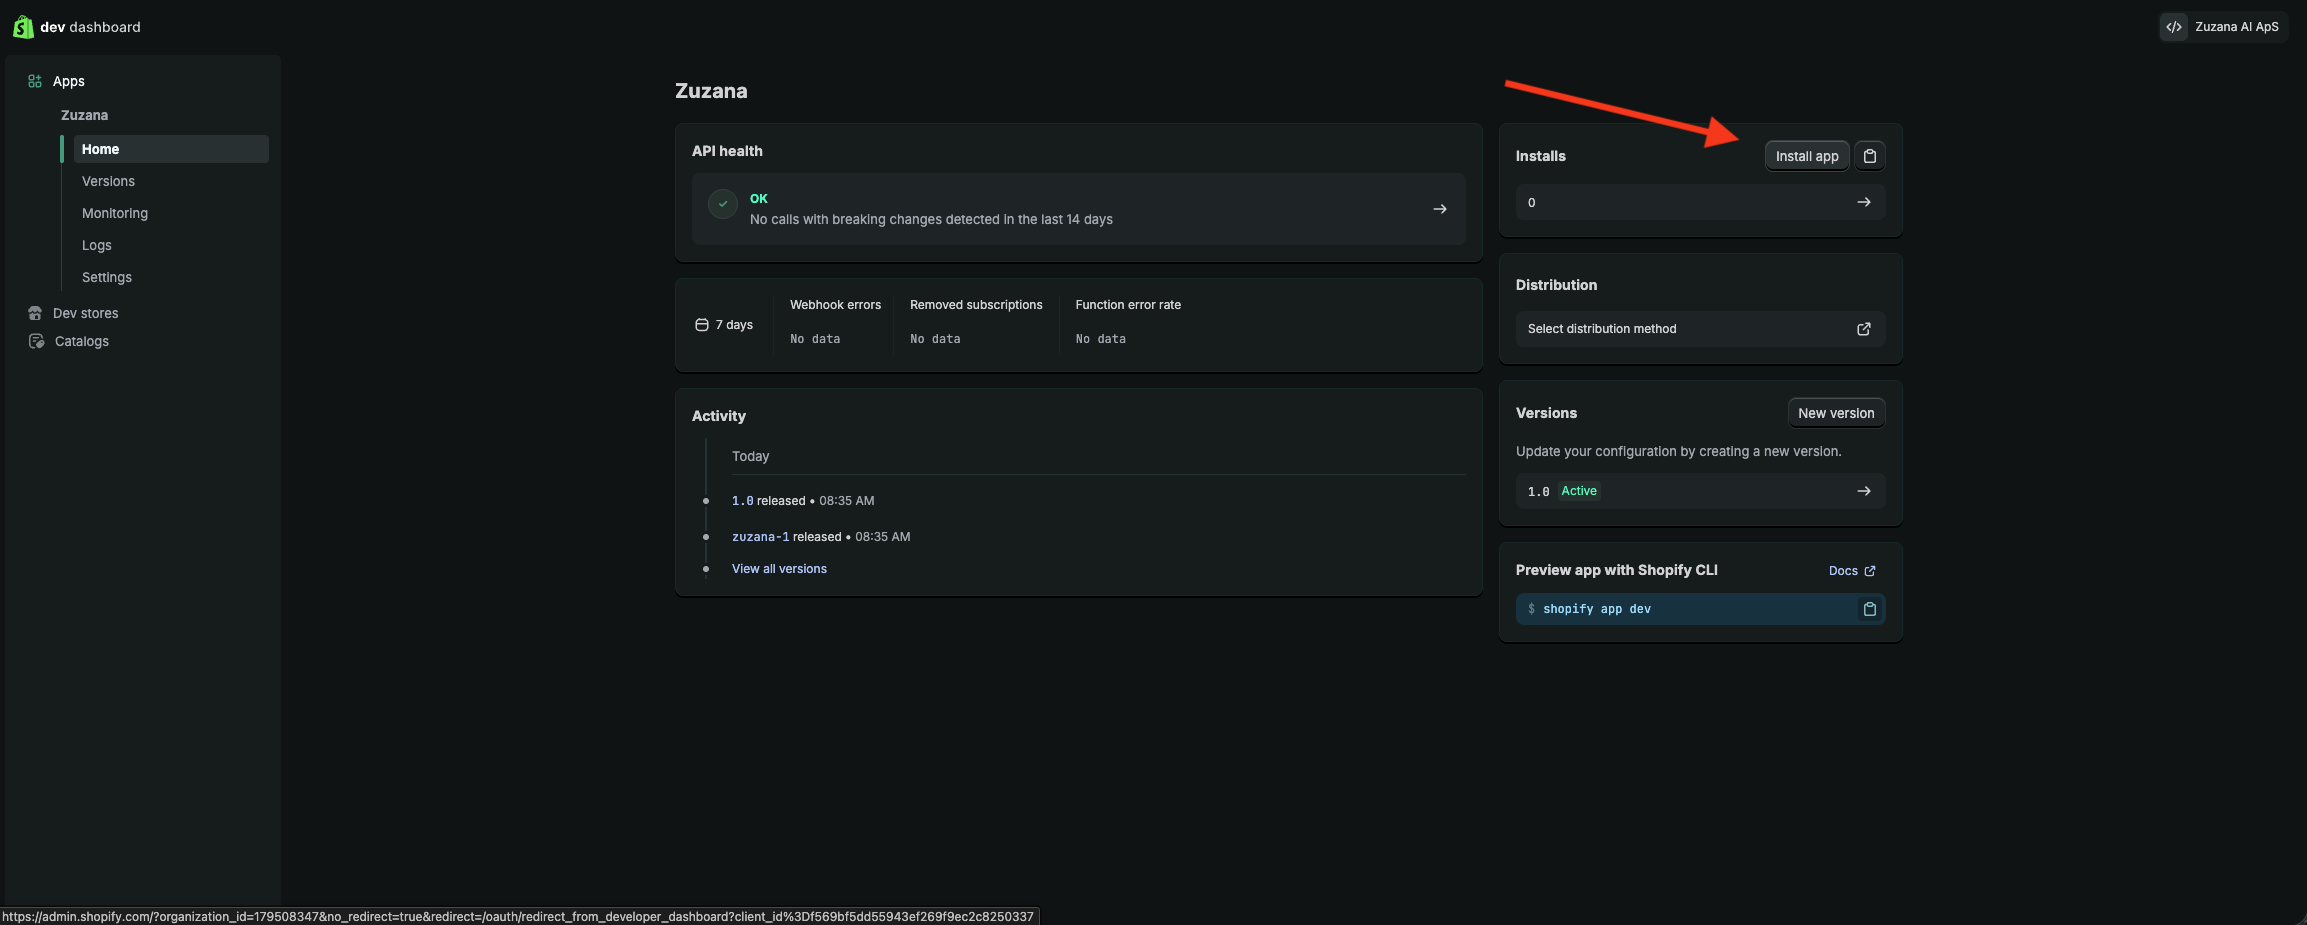
- Initiate Installation: Go back to the Home/Overview tab of your app.
- Install to Store: Click the large Install app button.
- Authorize: Select your Shopify store from the list and click Install on the Shopify Admin authorization page.

Phase 4: Keys
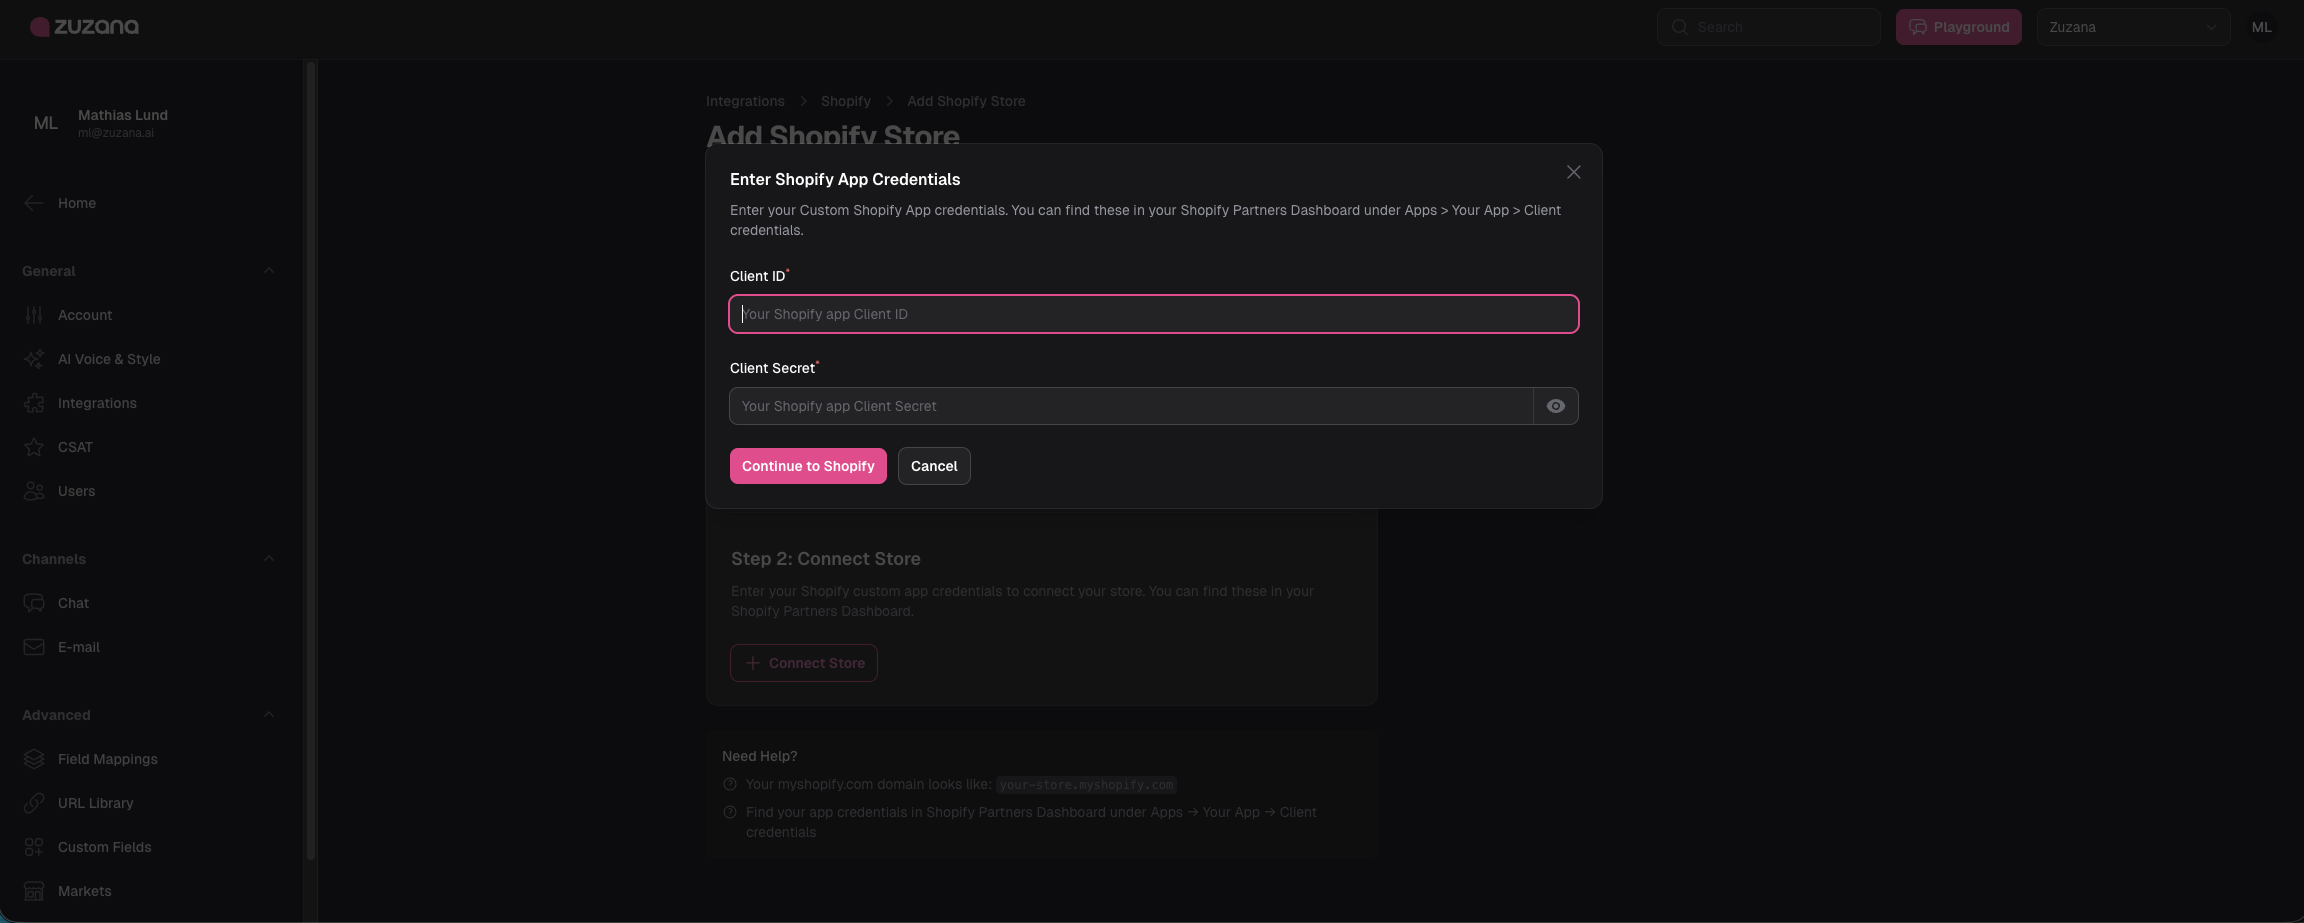
- The next step is to go to the Zuzana platform and create a new Shopify Store integration. Put in your Shopify domain (eg. the XXXX.myshopify.com domain).
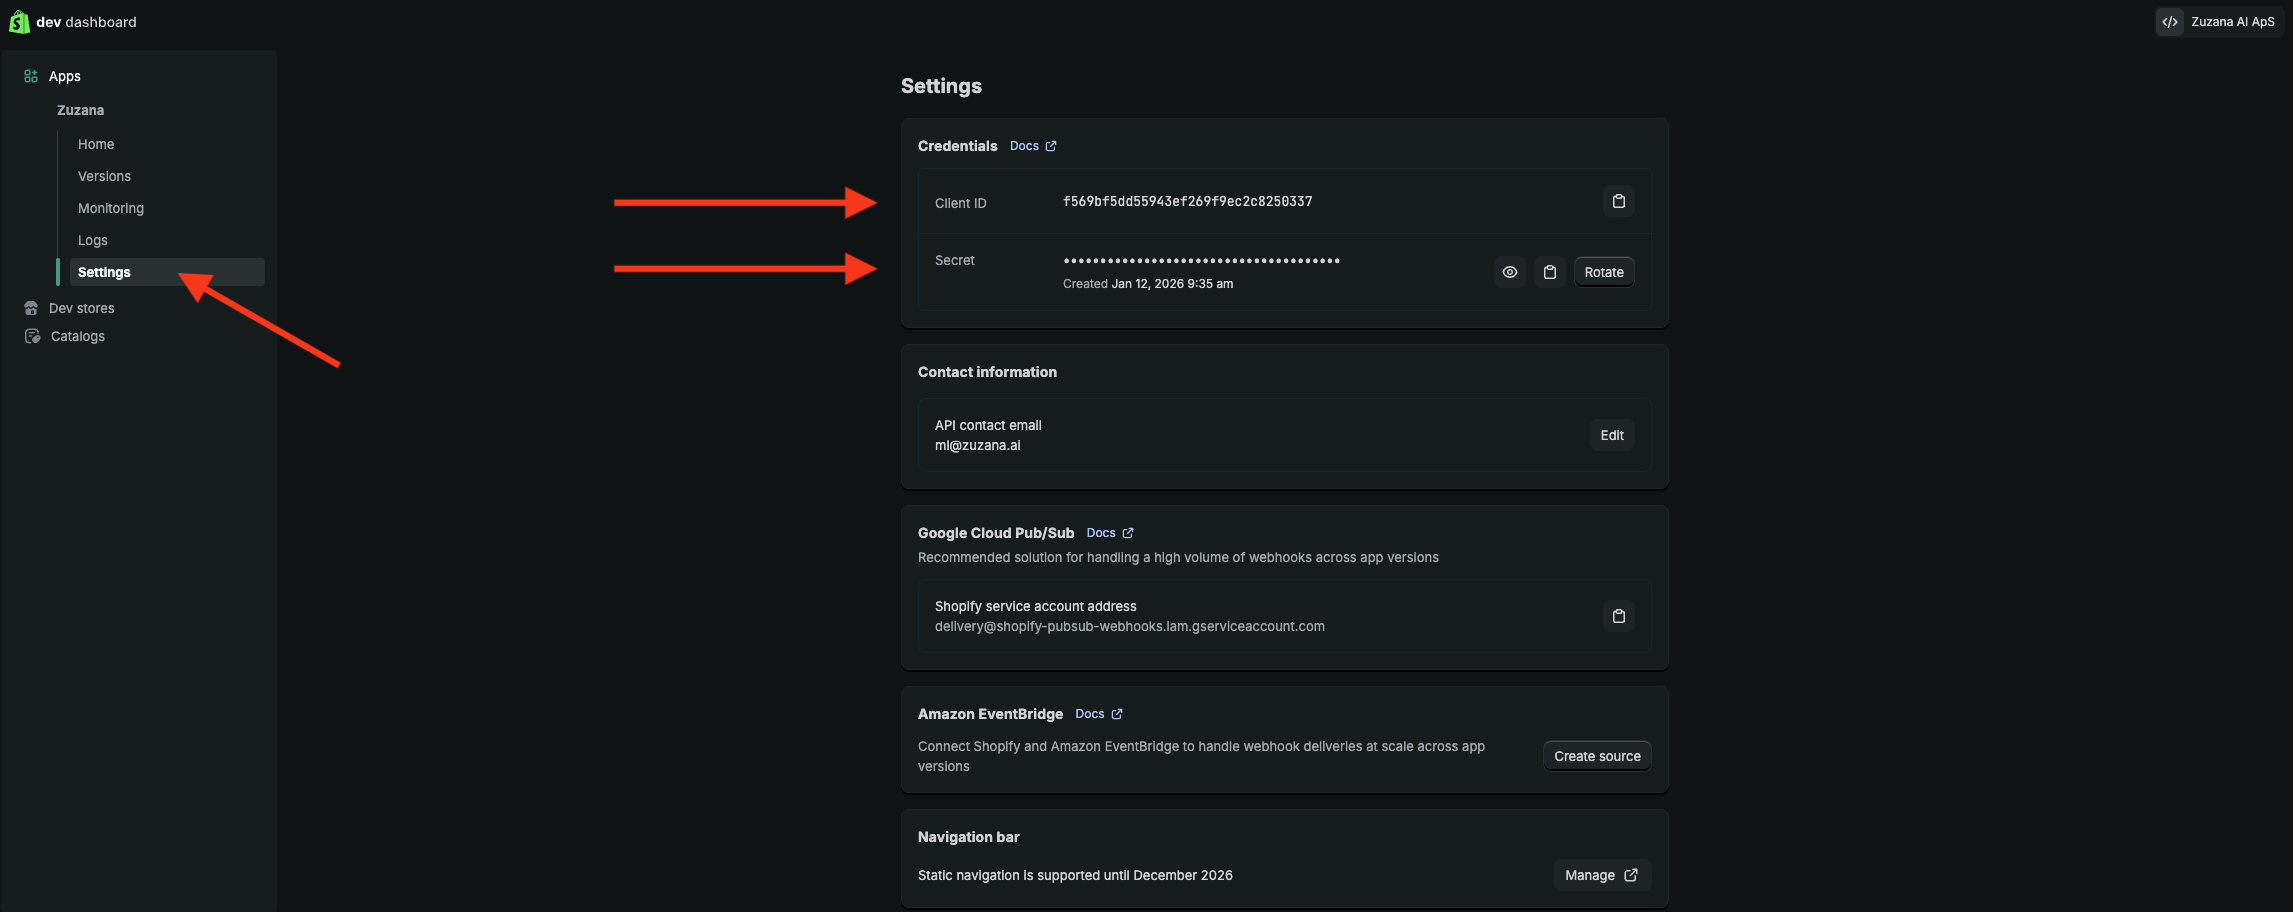
- Then go back to your Shopify Dev Dashboard and go to your app's settings. Find the App's Client ID & Secret, and copy-paste them into Zuzana.
- You're done! 💪
FYI: If you have multiple Shopify stores, you only need one Zuzana Shopify Custom app - but you need to install this app on all of the stores you'd like to connect with Zuzana.
Related Articles