How to setup your domain
Here is a quick guide to configuring your DNS settings in Zuzana to ensure your emails are verified and delivered successfully.
Published Apr 16, 2026
Step 1: Add Your Domain
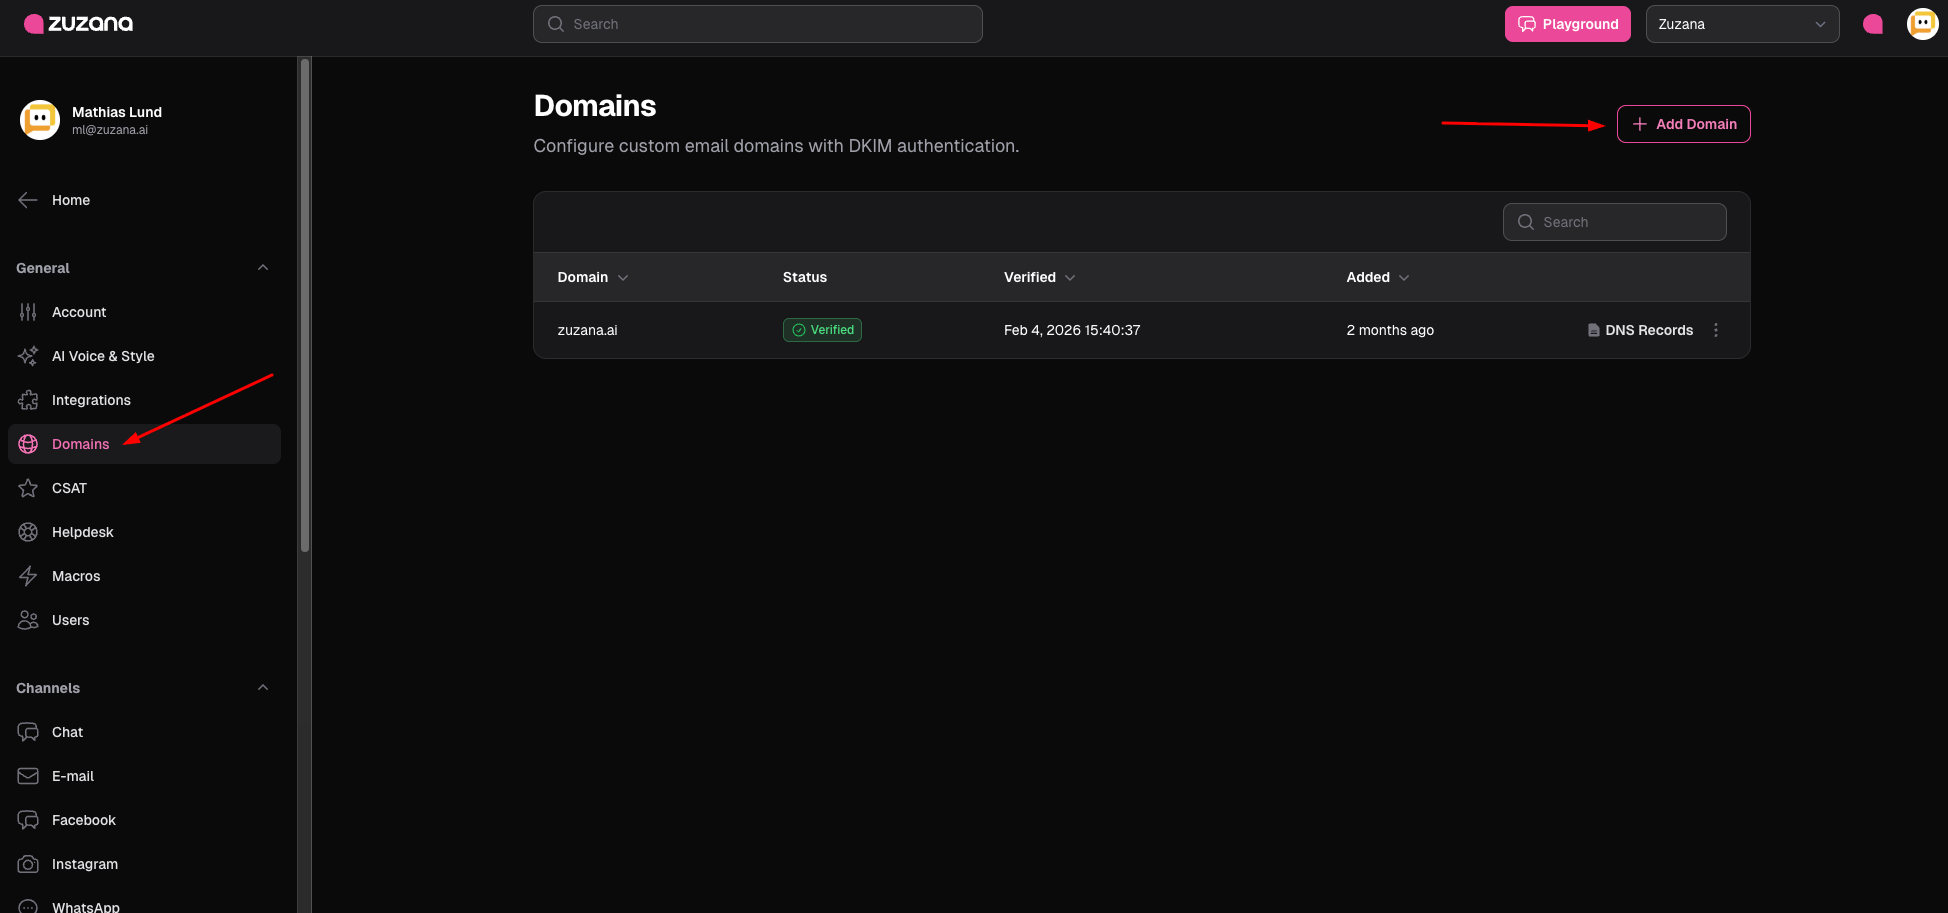
- In the left-hand sidebar, navigate to the General settings section and click on Domains.
- Click the + Add Domain button in the top right corner.
- Enter your domain name (e.g., yourdomain.com) and save.
Step 2: Access Your DNS Records
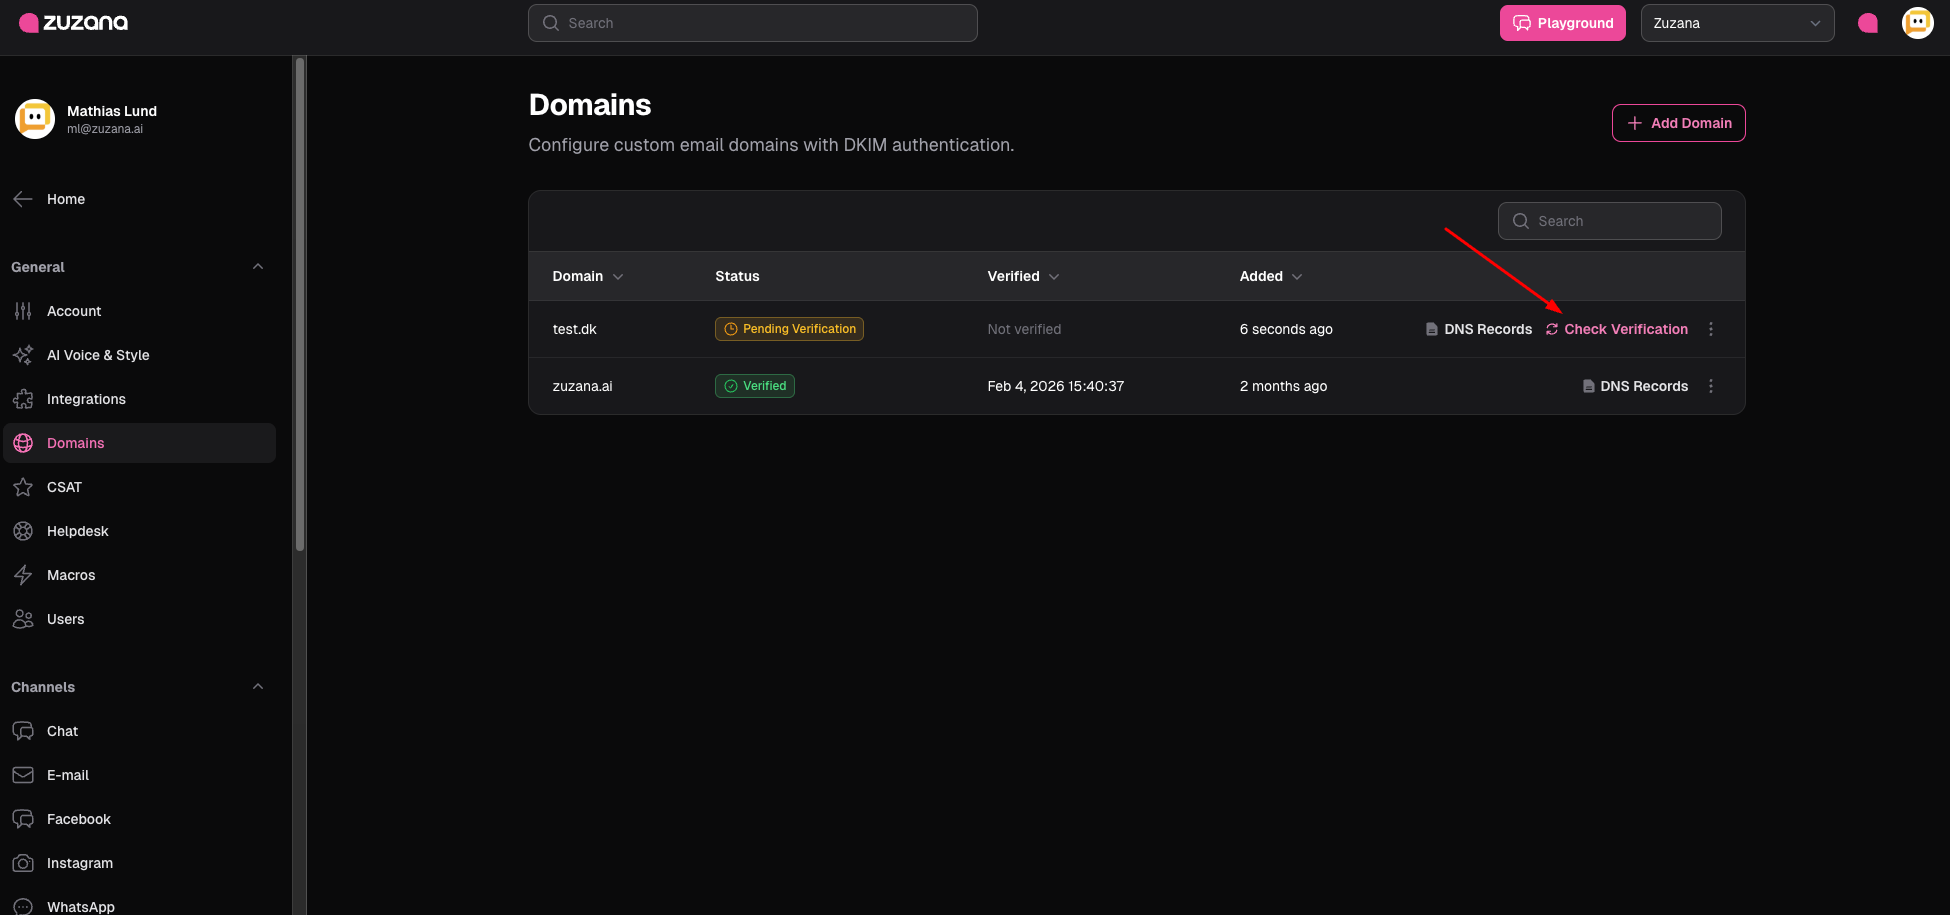
Once the domain is added, it will appear in your list with a "Pending Verification" status.
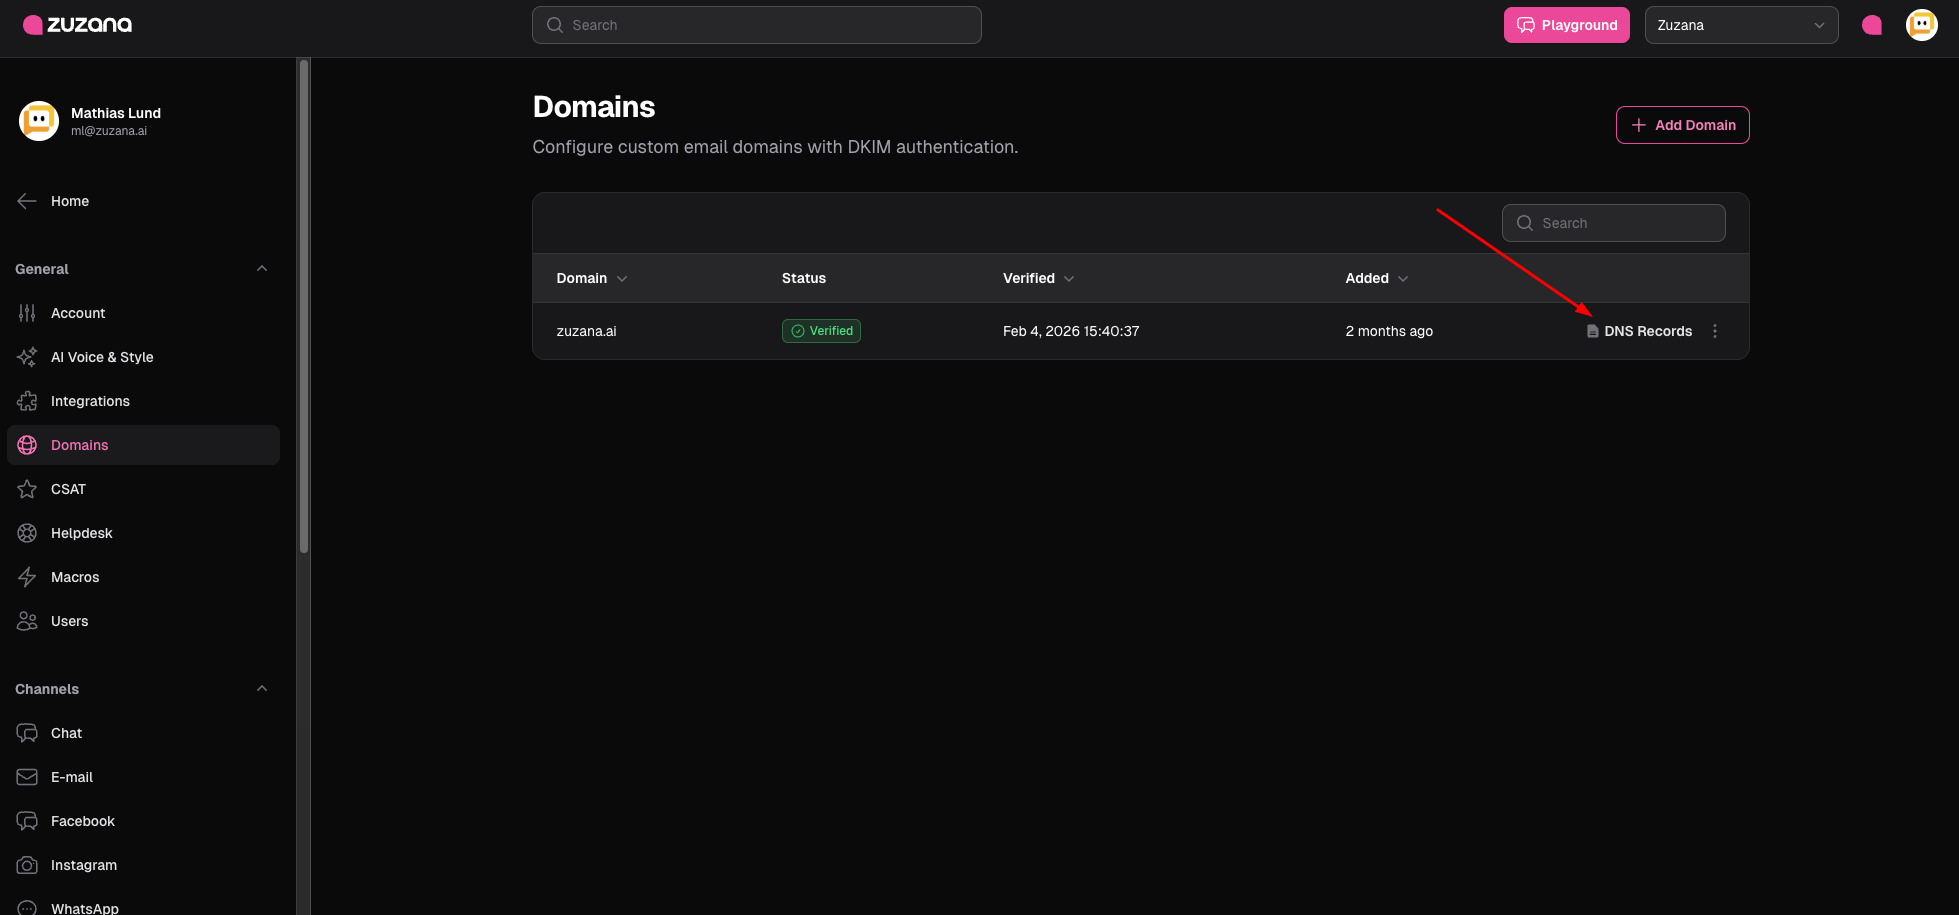
- Locate your domain in the list.
- Click on the DNS Records icon (the document symbol) to open the configuration modal.
Step 3: Update Your DNS Provider
You will need to log in to your domain registrar (like Cloudflare, GoDaddy, or Namecheap) and add the following records.
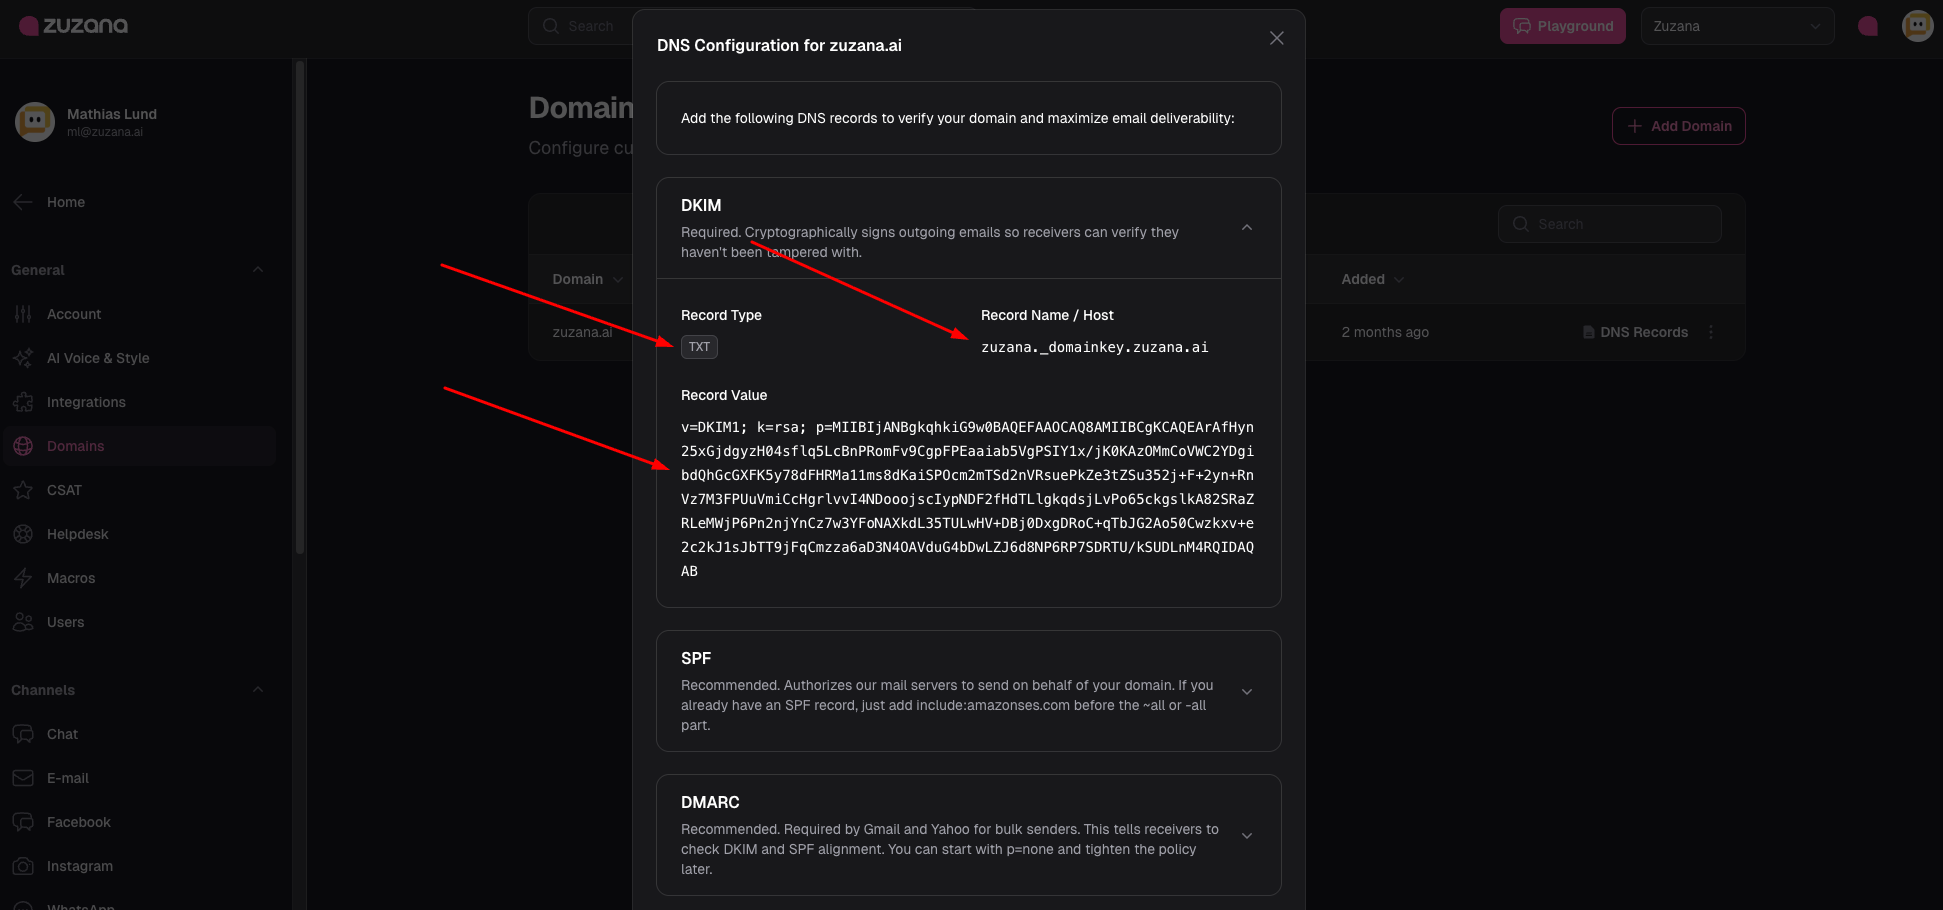
1. DKIM Record (Required)
This cryptographically signs your emails to prove they haven't been tampered with.
- Type: TXT
- Host/Name: zuzana._domainkey
Note: Some registrars automatically append your domain, so you may only need to enter zuzana._domainkey.
- Value: Copy the long string starting with v=DKIM1; k=rsa; p=... from the Zuzana modal.
Step 3
Step 4: Verify the Connection
After adding the records to your DNS provider, go back to the Zuzana Domains page.
- Click Check Verification next to your domain.
- Status: It will change to a green Verified badge once the records are detected.
Quick Tip: DNS changes can take anywhere from a few minutes to 48 hours to "propagate" (spread across the internet). If it doesn't verify immediately, grab a coffee and try again in an hour!